If your skin has been looking a little dull, rough, or generally lackluster lately, microdermabrasion at home can be a tempting addition to your beauty routine. I like the idea because it gives you a more intensive form of exfoliation without automatically having to book a professional facial.
That said, microdermabrasion is one of those treatments where more definitely isn’t better. The aim isn’t to scrub away as much skin as possible. It’s to gently remove some of the dead cells sitting on the surface so that your complexion looks smoother and fresher.
Professional microdermabrasion and home treatments aren’t quite the same. Dermatologists can use equipment that works more deeply, while at-home kits are generally designed to provide gentler exfoliation.
View more Skin Care Tips >
If you’re thinking about trying it yourself, here’s how I’d approach microdermabrasion at home safely and sensibly.
Learn more: Cosmetic Procedures: Our Complete Guide
What Is Microdermabrasion?
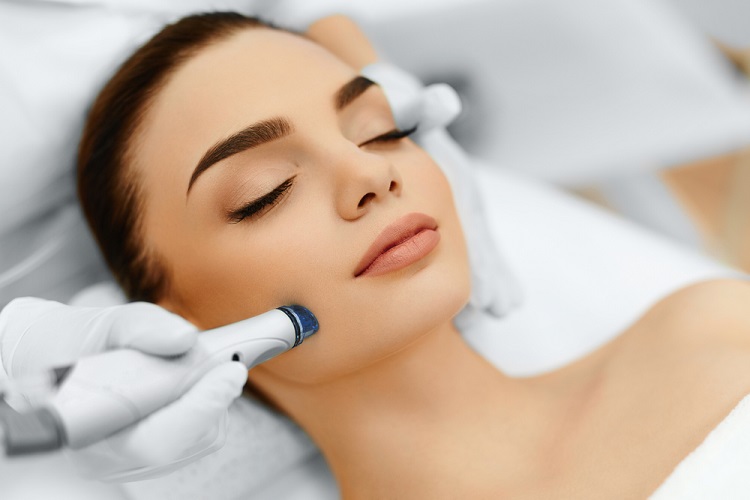
Microdermabrasion is a form of mechanical exfoliation. Rather than relying on an acid to loosen dead skin cells, a device physically exfoliates the outermost surface of the skin.
Depending on the system, an at-home device might use:
A diamond-textured tip
Fine exfoliating discs
Gentle suction
A combination of exfoliation and suction
The treatment focuses primarily on the uppermost layer of skin.
After treatment, skin can temporarily look and feel smoother and brighter. Microdermabrasion may also help improve the appearance of concerns such as dullness, uneven texture, enlarged-looking pores, some discoloration and very fine lines.
However, don’t expect an at-home device to remove deep wrinkles or significant acne scars. The American Academy of Dermatology notes that while microdermabrasion gently exfoliates the skin, it doesn’t actually treat acne scars.
Before You Start: Check Your Skin
The first thing I would do is look carefully at my skin rather than automatically reaching for the device because it’s “microdermabrasion day.”
Your skin should feel relatively calm and healthy.
I’d postpone treatment if my skin were:
Sunburned
Broken or scratched
Extremely dry or peeling
Inflamed
Irritated
Experiencing an active rash
Experiencing an active cold sore
Very sensitive following another treatment
I’d also be cautious about using microdermabrasion over inflamed acne. Running an exfoliating device over already irritated skin is unlikely to make it happier.
If you have eczema, rosacea, psoriasis, recurrent cold sores, a skin infection or another skin condition, I’d talk to a dermatologist before trying home microdermabrasion.
And if you’re using prescription skin treatments, it’s worth checking with your prescriber before adding an exfoliating device.

Step 1: Read Your Device Instructions
This might sound obvious, but it’s probably the most important step.
At-home microdermabrasion machines vary enormously. One device might have multiple suction strengths, while another uses interchangeable exfoliating discs or different tips.
Don’t assume the technique for one machine applies to another.
Before putting anything on your face, find out:
Which attachment is recommended for beginners
Which suction level you should start with
How quickly you should move the device
Which areas need to be avoided
How many passes are recommended
How often the manufacturer recommends using it
I’d always begin with the gentlest appropriate setting rather than seeing how much suction my skin can tolerate.
Step 2: Patch Test First
If you’ve never used the device before, test it on a small, discreet area first.
Follow the manufacturer’s patch-testing recommendations if provided and see how your skin responds before treating your entire face.
Some temporary redness can occur after microdermabrasion, but significant burning, swelling, bruising or prolonged irritation isn’t something I’d simply push through.
Step 3: Stop Strong Exfoliation Beforehand
Your skin doesn’t need a full exfoliating assault before microdermabrasion.
In the period surrounding your treatment, I’d avoid unnecessarily layering several aggressive exfoliating techniques together.
For example, I wouldn’t deliberately combine my microdermabrasion session with:
Facial scrubs
Strong AHA or BHA exfoliants
At-home chemical peels
Dermaplaning
Other abrasive treatments
Exactly how long you need to leave between products and treatments depends on what you’re using and how sensitive your skin is, so follow the instructions supplied with your skincare products and device.
The basic rule I follow is simple: if my skin already feels irritated or over-exfoliated, I don’t exfoliate it again.
Step 4: Cleanse Your Face
Start with completely clean skin.
I prefer a mild cleanser rather than anything scrubby or packed with exfoliating acids.
Remove:
Makeup
Sunscreen
Oil
Dirt
Skincare products
Then rinse thoroughly.
Microdermabrasion generally works best on skin that isn’t covered with creams and oils, although you should always follow the directions supplied with your specific device.
Step 5: Dry Your Skin Thoroughly
Pat your face completely dry with a clean towel.
Unless your device specifically says otherwise, you don’t want to run a microdermabrasion wand over wet, slippery skin.
I’d also give my skin a minute or two after washing so that I’m starting with a completely dry surface.
Step 6: Start With the Lowest Suitable Setting
Now you’re ready to use the machine.
For my first treatment, I’d choose the gentlest tip or setting recommended by the manufacturer.
You can always decide whether your skin tolerates a slightly stronger treatment in the future. You can’t undo excessive exfoliation once you’ve irritated your face.
And don’t judge effectiveness by how red your skin becomes. Redder does not mean better.
Step 7: Hold Your Skin Taut
Depending on your device’s instructions, using your free hand to gently hold the skin taut can make it easier to move the microdermabrasion tip smoothly.
This is particularly useful around areas such as the cheeks and jawline.
You shouldn’t have to stretch your skin aggressively. You’re simply creating a smooth surface for the device.
Step 8: Keep the Device Moving
This is one of the most important parts of the process.
Move your microdermabrasion device steadily across your skin according to its instructions.
Don’t park the suction tip on one area of your face.
Leaving a suction device in the same place for too long can increase the chance of redness or bruising.
Think smooth, deliberate movements rather than repeatedly grinding away at one stubborn patch.
Step 9: Work Methodically Around Your Face
I find it easiest to divide my face into sections rather than moving the device around randomly.
For example:
Forehead
Right cheek
Left cheek
Nose, if suitable for your device
Chin
Jawline
Follow the movement and number of passes recommended for your particular machine.
You don’t need to keep running over an area simply because it doesn’t instantly look different.
Microdermabrasion should be relatively gentle.
Step 10: Be Very Careful Around Delicate Areas
I wouldn’t take an at-home microdermabrasion device right underneath my eyes unless the manufacturer specifically states that the device and attachment are suitable for that area.
The skin around the eyes is thinner and more delicate than many other areas of the face.
I’d also avoid:
Eyelids
Lips
Inside or immediately around the nostrils
Broken skin
Moles unless you’ve checked the device instructions
Cuts
Active cold sores
Inflamed spots
When in doubt, leave the area alone.
Step 11: Don’t Keep Going Until Your Face Is Red
It’s easy to fall into the trap of thinking one extra pass will give you better results.
Resist it.
The purpose of microdermabrasion isn’t to make your face feel raw. Mild temporary redness or sensitivity can occur, but you shouldn’t be aiming for an intense reaction.
Once you’ve completed the recommended passes, stop.
Your skin may continue to look smoother over the following hours without any additional exfoliation.
Step 12: Apply a Gentle Moisturizer
Once I’ve finished microdermabrasion, I keep the rest of my skincare routine deliberately boring.
That’s a good thing.
Your freshly exfoliated skin doesn’t need a dozen active ingredients.
I’d usually reach for a simple, fragrance-free moisturizer designed for sensitive skin.
Ingredients commonly found in soothing moisturizers include:
Ceramides
Glycerin
Hyaluronic acid
Squalane
This is not the moment I’d experiment with the strongest active ingredient in my bathroom cupboard.
Step 13: Protect Your Skin From the Sun
Sun protection becomes particularly important following exfoliation.
If it’s daytime, apply a broad-spectrum SPF 30 or higher sunscreen and be sensible about sun exposure.
I’d continue being especially careful with sun protection over the following days.
Sun protection isn’t merely an aftercare extra, either. If you’re using microdermabrasion because you’re concerned about uneven pigmentation or sun damage, consistently protecting your skin from UV exposure is an important part of preventing more damage.
What Should You Avoid After Microdermabrasion at Home?
For the remainder of the day, I treat my skin gently.
Depending on the instructions for your device and your normal skincare routine, you may need to temporarily avoid potentially irritating products.
Personally, I wouldn’t immediately follow microdermabrasion with another intensive exfoliating treatment.
That means giving things such as strong exfoliating acids, scrubs and peels a break until the skin feels completely normal again.
I’d also avoid picking, rubbing or aggressively cleansing my face.
Think cleanse, moisturize, protect.
That’s usually plenty.
How Often Can You Do Microdermabrasion at Home?
There’s no single schedule that suits every at-home device.
This is where following the manufacturer’s instructions matters.
Your ideal frequency also depends on:
Your skin type
The strength of the device
How sensitive your skin is
The attachment you’re using
Other exfoliating products in your routine
I wouldn’t assume that doing it more frequently will speed up results.
Over-exfoliation can leave your skin feeling dry, tight, uncomfortable and irritated.
If your skin hasn’t completely recovered from your previous treatment, that’s a pretty good indication that it isn’t ready for another one.
What Results Can You Expect?
Home microdermabrasion is best approached with realistic expectations.
The most noticeable immediate difference is often in skin texture and brightness.
Your face may feel:
Softer
Smoother
Less rough
Fresher-looking
With appropriate use, you might also notice gradual improvement in the appearance of mild unevenness.
Professional microdermabrasion may be used for concerns including uneven tone and texture, age spots, dark marks and dull-looking skin.
But remember that professional treatments generally go deeper than at-home kits.
So I wouldn’t buy a home machine expecting it to erase deep acne scars, substantial wrinkles or significant pigmentation.
Can Microdermabrasion Make Your Skin Worse?
It certainly can if you overdo it.
Possible short-term effects include redness, sensitivity and tenderness. More aggressive suction may also contribute to bruising in susceptible skin.
This is another reason I’m wary of turning up the intensity simply because a low setting doesn’t feel dramatic enough.
The safest treatment isn’t necessarily the one you can feel working the most.
Who Should Be Especially Cautious?
I’d get professional advice before using a home device if I had a significant skin condition or wasn’t sure whether my skin was suitable.
I’d also speak with a dermatologist if I were trying to treat something that might need a proper diagnosis.
For example, don’t repeatedly exfoliate a dark spot simply because you assume it’s ordinary pigmentation. Any new, unusual or changing skin lesion is something I’d want assessed professionally rather than attacking it with a beauty device.
Professional microdermabrasion has an excellent safety record when carried out by a dermatologist, according to the American Academy of Dermatology.
At-Home vs. Professional Microdermabrasion
One thing I think is worth emphasizing is that buying a home microdermabrasion machine isn’t the same as recreating a dermatologist’s procedure in your bathroom.
Home systems are generally milder.
That can actually be an advantage if your goal is routine exfoliation rather than treatment of a particular skin concern.
However, if you’re dealing with:
Significant pigmentation
Persistent acne marks
Scarring
Pronounced sun damage
A skin condition
Very sensitive or reactive skin
I’d be much more inclined to speak to a dermatologist first.
They can tell you whether microdermabrasion is even the right treatment.
My Simple Microdermabrasion at Home Routine
If I wanted to keep things as simple as possible, this would be my routine:
Before
Gentle cleanser → dry skin completely → check that there is no irritation.
Treatment
Use the appropriate clean attachment → lowest suitable setting → smooth, controlled passes → don’t linger over one spot.
After
Gentle moisturizer → broad-spectrum SPF 30+ during the day → skip unnecessary exfoliation and irritating products while the skin settles.
That’s really all it needs to be.
Frequently Asked Questions
1. Does at-home microdermabrasion hurt?
It shouldn’t be genuinely painful. You may feel suction and a slightly scratchy or abrasive sensation, depending on the machine.
If you experience significant pain, burning or intense discomfort, stop using the device.
2. Should I steam my face before microdermabrasion?
I wouldn’t add steaming unless the manufacturer of your device specifically recommends it.
Microdermabrasion doesn’t require you to “open your pores,” and excessive heat immediately before exfoliation could potentially make sensitive skin feel more irritated.
3. Can I use microdermabrasion on acne?
I’d avoid passing an abrasive or suction device over inflamed, painful or broken acne lesions.
Microdermabrasion also shouldn’t be confused with an acne-scar treatment. The AAD notes that it doesn’t treat acne scars, although dermatologists may use it to help even skin tone as part of a wider treatment plan.
4. Can I wear makeup afterward?
If possible, I prefer to give freshly exfoliated skin some breathing room rather than immediately covering it with heavy makeup.
Follow the aftercare instructions supplied with your device, particularly if your skin is still red or sensitive.
5. Can I use retinol after microdermabrasion?
I’d be cautious about combining strong or potentially irritating actives with a fresh microdermabrasion treatment.
Exactly how long you should leave between them depends on the retinoid you’re using, its strength and your skin. If you’re using a prescription retinoid, ask your prescriber or dermatologist for individualized advice.
6. Can I use vitamin C after microdermabrasion?
Some people tolerate vitamin C well, but freshly exfoliated skin may be more sensitive.
If your vitamin C product tends to sting or contains additional active ingredients, I’d skip it immediately afterward and concentrate on gentle moisturizer and sun protection.
7. Can I microdermabrade my neck?
Only if your particular device is approved for that area.
The neck can be more sensitive than the face, so I’d use considerably more caution and follow the manufacturer’s instructions rather than simply extending my facial routine downward.
8. Can microdermabrasion shrink pores?
It can’t physically change the permanent size of your pores, but smoother skin and removal of surface debris can make enlarged pores look less noticeable. Enlarged-looking pores are among the cosmetic concerns professional microdermabrasion may improve.
9. How soon will I see results?
You may notice smoother or brighter-looking skin after a treatment, although more gradual concerns won’t transform overnight.
At-home treatments are typically gentler than those performed by a dermatologist, so expectations should be realistic.
Final Thoughts
Microdermabrasion at home doesn’t need to be complicated.
In fact, I think the biggest mistake you can make is trying to make it complicated — stronger suction, extra passes, acids beforehand, retinol afterward and another exfoliation session two days later.
Gentle and consistent beats aggressive.
Start with clean, healthy skin, use your device exactly as directed, don’t repeatedly go over the same area, and finish with uncomplicated moisturizer and good sun protection.
Most importantly, pay attention to your skin.
If your face feels comfortable and looks a little smoother afterward, great. If it’s burning, extremely red or still irritated when you’re thinking about your next session, give it more time.
Home microdermabrasion should leave you feeling polished — not peeled.
Sources
American Academy of Dermatology (AAD) – Microdermabrasion: Overview
Excellent for how microdermabrasion works, benefits, expectations, and professional vs. at-home treatment.
https://www.aad.org/public/cosmetic/age-spots-marks/microdermabrasion-overview
Cleveland Clinic – Microdermabrasion: What It Is, Benefits & Results
Useful for benefits, possible side effects, skin concerns it may improve, and what happens during treatment.
https://my.clevelandclinic.org/health/treatments/25124-microdermabrasion
Mayo Clinic – Age Spots: Diagnosis and Treatment
A strong medical source covering microdermabrasion as a skin-resurfacing treatment, including possible irritation and precautions.
https://www.mayoclinic.org/diseases-conditions/age-spots/diagnosis-treatment/drc-20355864